help page dogmills
It sometimes happens that there are problems with the operation or assembly of our dog treadmills. Have any parts been damaged during shipment? Please take pictures and contact us. We are always at your service and will find a solution as quickly as possible. On this page we explain how you can solve possible problems on your own.
1 operation connectors
Is there something wrong with the operation of your dog treadmill? No worries! Almost all of our mills can be adjusted, including the wheel suspension.
Using the supplied Allen key and the instructions below, it is fairly easy to adjust your Dogmill on your own again.
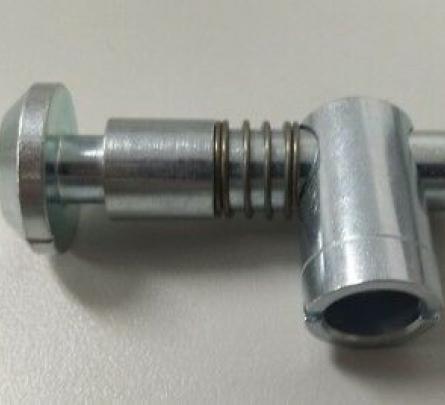
On this picture you can see how the connector works. Make sure that the small groove in the head of the bolt always points towards the connector for proper functioning.

2 feet installing Dogmills Standard
When installing the feet on the Dogmills Standard, it is sometimes necessary to press the head of the bolt with a flat screwdriver to ensure that the connector is properly tightened.
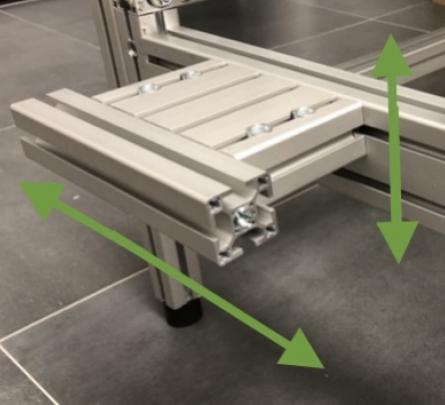
3 install wheel suspension
Use the supplied Allen key, square and hammer.
Do not open the connectors completely, but slightly, so that you can carefully adjust the aluminium profiles with a hammer.
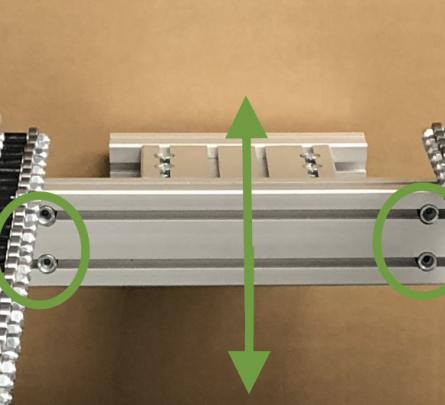
4 adjusting the heigt of the MAIN WHEELS
You can adjust the height of the wheel suspension independently. Make sure that the wheels are exactly at the same height as the bearings.
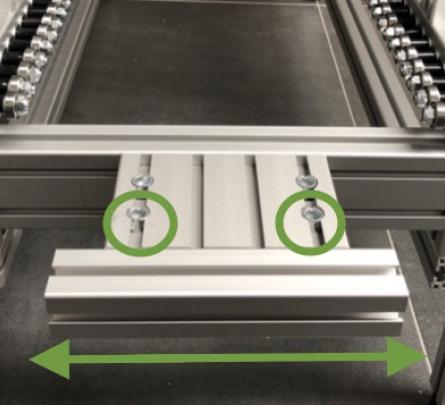
5 aligning the MAIN WHEELS in the middle
The illustration shows how to adjust the wheels. Make sure that the main wheels are exactly in the middle of the treadmill. Use a square peg for this.